Get started with Kasadaka
This is a roadmap to get you started on building your own Kasadaka or to contribute to the development of Kasadaka services.
- Get your hardware
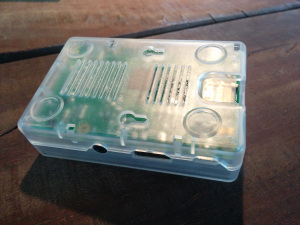
1x Raspberry Pi 2 B
1x SD Card (preferably of at least 8GB)
1x Huawei E169 dongle
- Get your operating system
Go to the Raspberry Pi download page and download the NOOBS torrent or .zip.
Extract the files from the .zip
Download SD Formatter 4.0 and install the software for Windows or Mac.
Connect the SD card to your computer (SD card reader) and check the drive letter that is assigned to it, for instance "G:/".
Open SD Formatter 4.0 and select the drive letter and format your SD card.
Drop all the extracted NOOBS files into the SD card drive.
Remove the SD card and insert it into the Raspberry Pi slot.
Plug a keyboard, mouse, monitor cables and power cable into the Raspberry Pi.
Once the Pi shows a window with a list of operating systems, select Raspbian and click install.
Log in by using the username pi and the password raspberry.
The necessary hardware consists of a Linux based computer and a GSM dongle. The supported dongles have been listed on the Hardware page. The Raspberry Pi has been chosen to use as the Linux based computer, of course there are more computers that could achieve the same. The Pi is affordable, small-sized and has a large scaled community of developers and interested parties. In order to get started and go through the projet the same way that we did, you should possess the following hardware:
Once you the hardware is arranged, the Pi should be set up.
Download NOOBS
Format the SD card
Drop the NOOBS files
Setup of the Pi
- Get your software
sudo apt-get update
sudo apt-get upgrade
sudo apt-get install asterisk
sudo apt-get -y install make gcc g++ libxml2 libxml2-dev ssh libncurses5 libncursesw5 libncurses5-dev libncursesw5-dev linux-libc-dev sqlite libnewt-dev libusb-dev zlib1g-dev libmysqlclient15-dev libsqlite0 libsqlite0-dev bison openssl libssl-dev libeditline0 libeditline-dev libedit-dev mc sox libedit2 libedit-dev curl libcurl4-gnutls-dev apache2 libapache2-mod-php5 php-pear openssh-server build-essential openssh-client zlib1g zlib1g-dev libtiff4 libtiff4-dev libnet-telnet-perl mime-construct libipc-signal-perl libmime-types-perl libproc-waitstat-perl mpg123 libiksemel-dev php5 php5-cli mysql-server php5-mysql php-db libapache2-mod-php5 php5-gd php5-curl mysql-client vim
Go to https://code.google.com/p/asterisk-chan-dongle/downloads/detail?name=chan_dongle-1.1.r14.tgz& in the browser
Download and extract chan_dongle-1.1.r14.tgz on your Desktop
cd/Desktop/chan_dongle-1.1.r14
./configure
make
sudo make install
cd /etc/asterisk
sudo cp /home/pi/Desktop/chan_dongle-1.1.r14/etc/dongle.conf .
sudo asterisk -vvvc
sudo asterisk -r
Type the following commands in the command line.
Update the system and install Asterisk and the pre-requisites
Open the graphic interface by typing startx and go to the browser.
Install Chan dongle
Open the command line in root and type the following:
Start Asterisk from command line
- Develop your service
sudo apt-get install mcedit
cd /etc/asterisk/
mcedit extensions.conf
sudo asterisk -r
dialplan reload
Go to http://www.ekiga.org/ and download the Ekiga 4.0 softphone.
cd /etc/asterisk
mcedit sip.conf
In order to create your own service, Asterisks' dialplan should be adapted. The following code is needed in order to open and adapt the dialplan.
You can now edit the dial plan (extensions.conf) to your preference. In the default context you can see that the standard dialplan is the demo. In order to change this, create your own context at the very bottom of the file, for instance [dialplan1]. Do not forget to link your [default] context to your newly created context, instead of to [demo].
Do not hesitate to check Asterisks' wiki, in which numerous options and examples for the dialplan are listed.
Once you are done editing your dialplan, type the following into the command line:
And reload the dialplan every time you changed something.
Download the Ekiga softphone and set up the sip.conf file
In order to test your dialplan without using a SIM-card and a GSM dongle, you can use the Ekiga softphone to call in.
Go back to the command line and type:
At the very bottom of the sip.conf file, type:
[user1]
type=friend
secret=your password
host=dynamic
context=default
deny=0.0.0.0/0
permit=your IP-address/255.255.255.0
[user2]
type=friend
secret=your password
host=dynamic
context=users
deny=0.0.0.0/0
permit=your IP-address/255.255.255.0
Call your service
Open the Ekiga softphone and call to sip:user2@localhost. Calling this should be done if Asterisk is started (asterisk -r). You should be able to here your service now. If not, double check if you have followed all the steps correctly.
If you would like to use a SIM-card and dongle instead of a softphone, plug one of the listed dongles into the Raspberry Pi, containing a unlocked SIM card. The system should be able to recognize the dongle thanks to chan_dongle. The result should be the same as with the softphone, meaning that you are now able to hear your own service.